In the previous part, we introduced the hardware configuration of the self-built NAS and the related virtualization system ESXi. In this part, we will build our NAS system, Synology, and Debian server on top of the virtual layer. Synology actually supports Docker and the installation of some media services such as Plex. However, in the spirit of using dedicated systems for specific tasks, we will use Debian+Docker to install media services and try onboard graphics card passthrough for hardware decoding through Debian.
Xpenology
Xpenology refers to the installation of the Synology system on non-official hardware. Currently, this area is relatively mature, with many tutorials and tools available to achieve this. Here, we are using the arpl tool, which can be found at https://github.com/fbelavenuto/arpl .
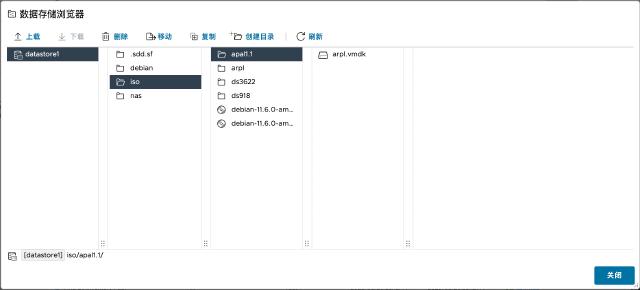
First, we download the latest image from arpl releases. Since we are using ESXi, we choose the vmdk-flat version. Unzip the downloaded compressed package and upload the two files arpl-flat.vmdk and arpl.vmdk from the compressed package to the ESXi data storage. After successful upload, only a single file will be displayed in the data storage, as shown in the figure:
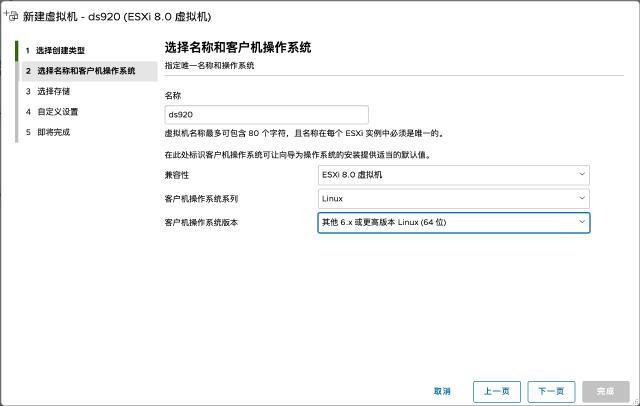
Create a new virtual machine, and make sure to choose Other 6.x or later Linux (64-bit) as the operating system version (some types cannot select PCI devices when choosing hard disk passthrough later).
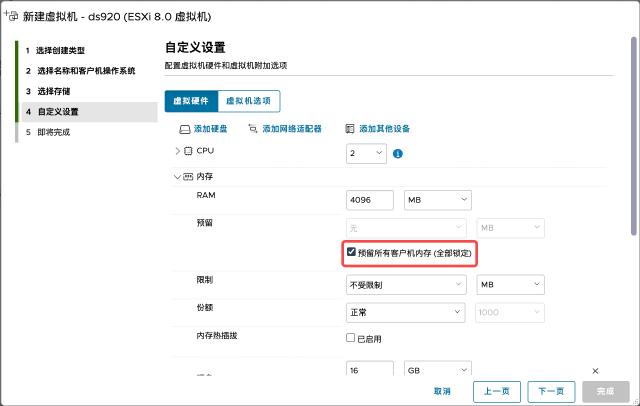
Choose CPU and memory configuration, 2 cores and 4GB, and set the memory configuration to Reserve all guest memory.
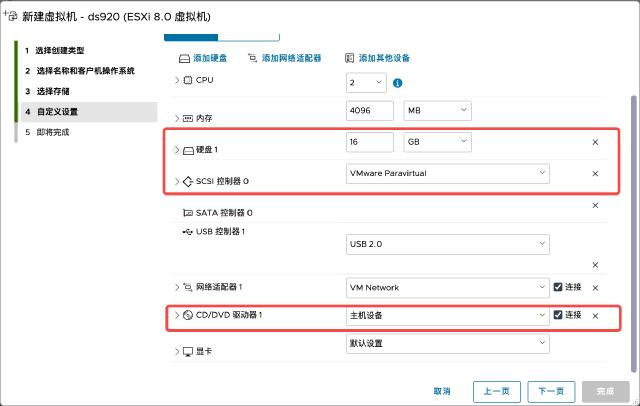
Remove the default hard disk, SCSI controller, and CD/DVD drive.
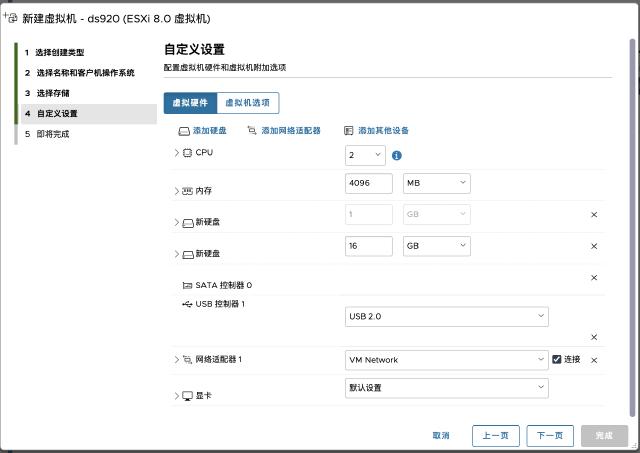
First add an existing hard disk and select the arpl file in the data storage. Then add a new standard hard disk.
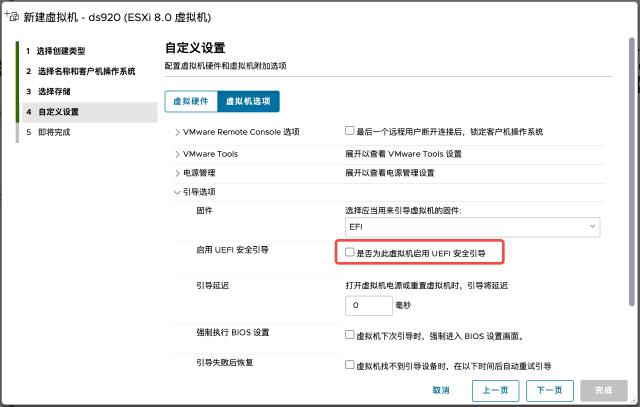
Go to Virtual Machine Options -> Boot Options -> Enable UEFI Secure Boot and disable this configuration.
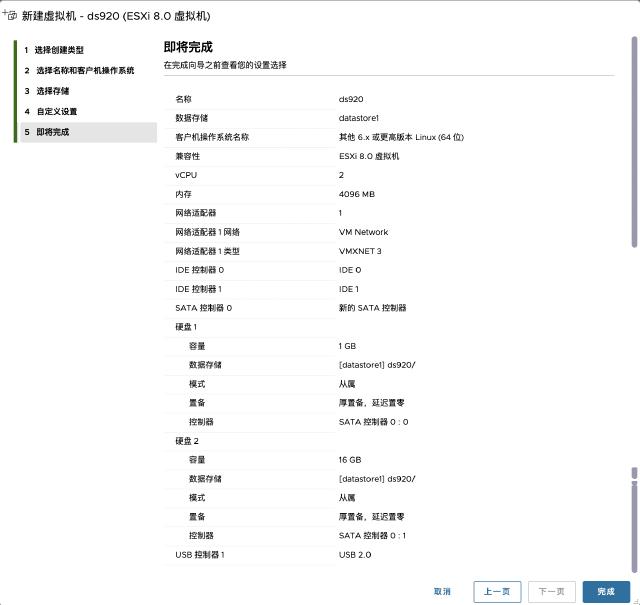
Check the final configuration, as shown in the figure:
After completion, start the virtual machine and wait for arpl to load. Once loaded, the following information will appear:

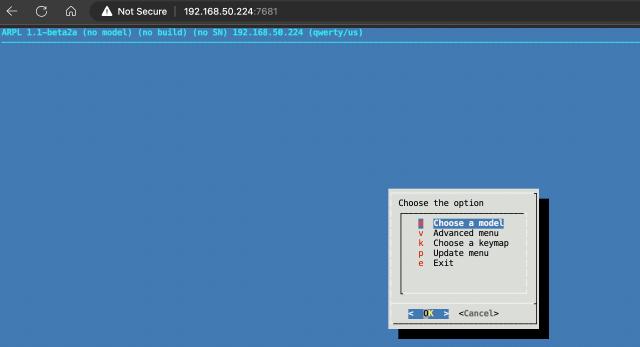
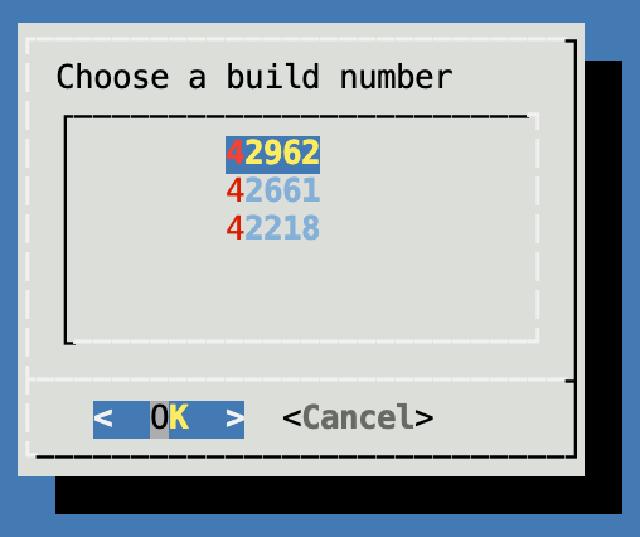
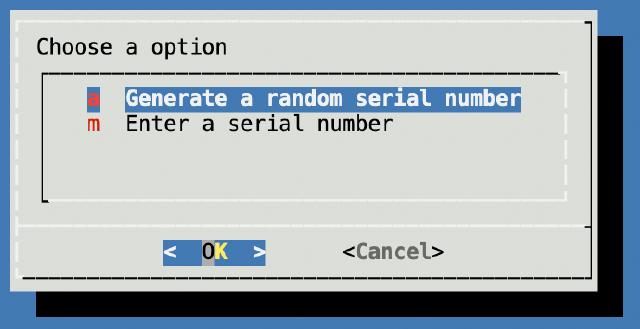
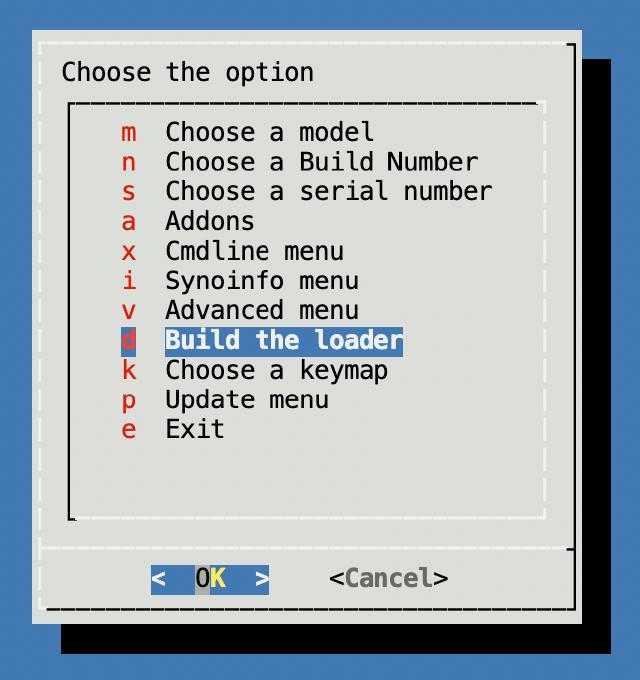
Access the prompted address to enter the configuration page and follow the steps:
- Choose a model
- Choose a build number
- Generate a random serial number
- Build the loader
- Wait for downloading DS image

- Boot the loader
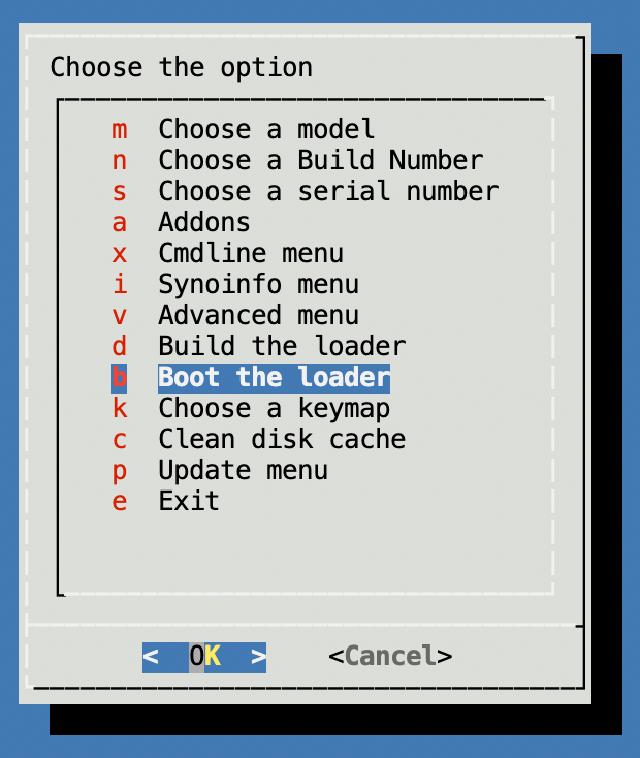
- Booting

After loading is complete, it will display Connection Closed. Access port 5000 under the same IP to enter the Synology setup page.
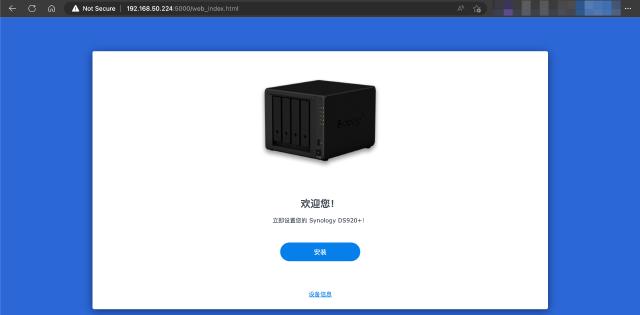
Follow the steps and finally enter the progress bar.
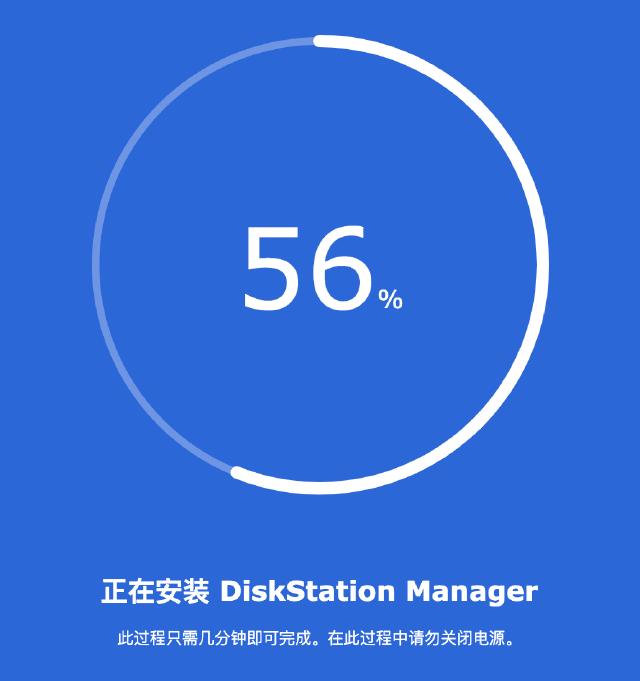
After successful installation, shut down the machine and configure hard disk passthrough (theoretically, this can be configured at the very beginning). Enter the ESXi management interface, Host - Manage - Hardware - PCI Devices, find our independent storage hard disk, and switch to passthrough.
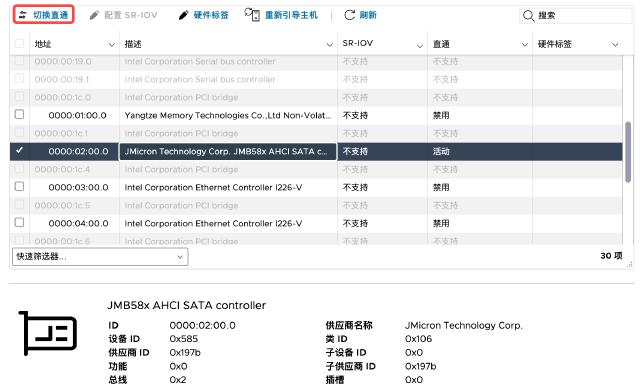
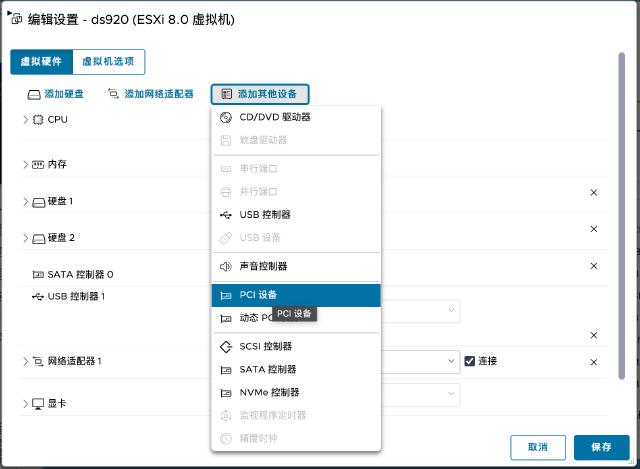
Finally, edit the virtual machine, add a PCI device, and select the passthrough hard disk.
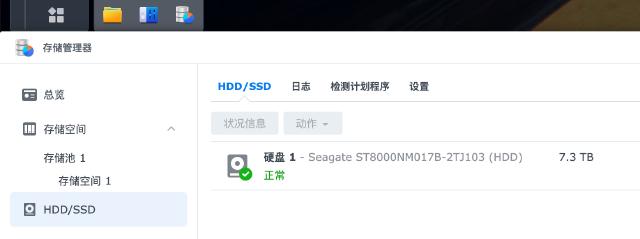
Detect the disk in the Synology Storage Manager.
This concludes the entire Synology build process. Subsequent settings in Synology can be explored by referring to online resources and will not be repeated here.
Debian
As a mainstream Linux distribution, Debian is stable and well-supported by various ecosystems, so we will try to use Debian as a media server and for other purposes. The installation of Debian will not be covered here (it should be noted that the onboard graphics card also needs to have Reserve all guest memory checked in the memory configuration). We will mainly introduce the onboard graphics card passthrough capability of ESXi+Debian and then test Jellyfin’s hardware decoding for video playback.
Enabling Onboard Graphics
Download and install the latest kernel, reboot, and check the kernel version:
mkdir kernel && cd kernel
wget http://ftp.debian.org/debian/pool/main/l/linux-signed-amd64/linux-image-6.1.0-7-amd64_6.1.20-1_amd64.deb
sudo dpkg -i linux-image-6.1.0-7-amd64_6.1.20-1_amd64.deb
sudo reboot

# check kernel
uname -a
# Linux debian 6.1.0-7-amd64 #1 SMP PREEMPT_DYNAMIC Debian 6.1.20-1 (2023-03-19) x86_64 GNU/Linux
Disable ESXi onboard graphics card usage:
In ESXi configuration, go to Host - Actions, enable SSH, SSH into the system and run the following command:
esxcli system settings kernel set -s vga -v FALSE.Add PCI onboard graphics device and disable Debian virtual graphics card:
Edit the virtual machine configuration, Virtual Hardware - Add other devices - PCI device, and select the onboard graphics card.
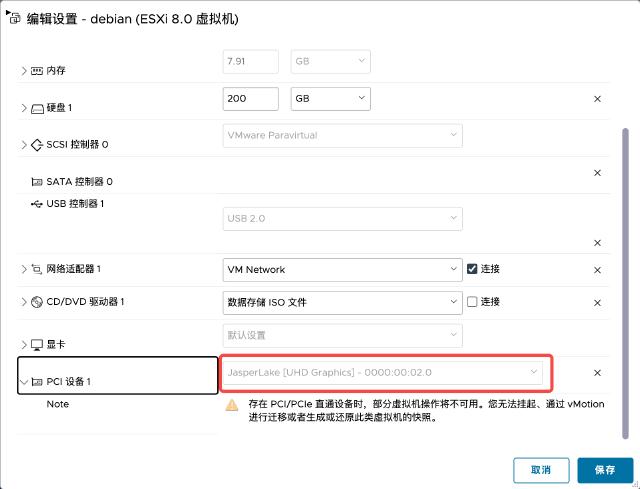
Edit the virtual machine configuration, Virtual Machine Options - Advanced - Configuration Parameters - Edit Configuration, and change the value of
svga.presenttoFALSE.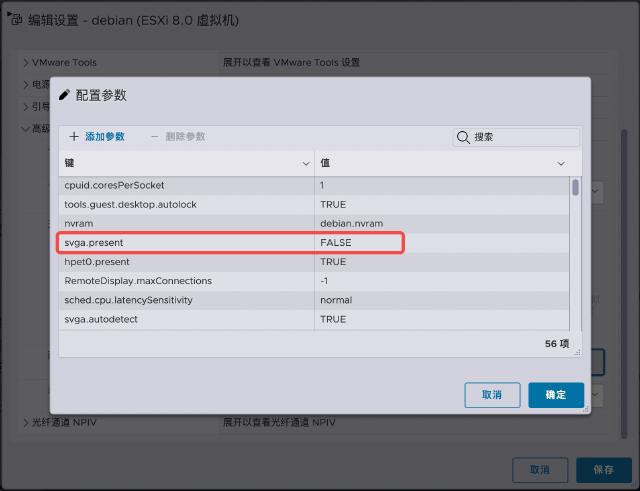
Start the virtual machine and check if the onboard graphics card is loaded. If loaded correctly, you will see the
renderD128device:ls -l /dev/dri total 0 drwxr-xr-x 2 root root 80 Mar 27 00:09 by-path crw-rw---- 1 root video 226, 0 Mar 27 00:09 card0 crw-rw---- 1 root render 226, 128 Mar 27 00:09 renderD128Fill in the missing 915 guc huc dmc firmware:
mkdir -p /lib/firmware/i915 && cd /lib/firmware/i915
curl -LO https://git.kernel.org/pub/scm/linux/kernel/git/firmware/linux-firmware.git/plain/i915/ehl_guc_70.1.1.bin
curl -LO https://git.kernel.org/pub/scm/linux/kernel/git/firmware/linux-firmware.git/plain/i915/ehl_huc_9.0.0.bin
curl -LO https://git.kernel.org/pub/scm/linux/kernel/git/firmware/linux-firmware.git/plain/i915/icl_dmc_ver1_09.bin
Enable onboard graphics encoding and then reboot:
echo "options i915 enable_guc=3" > /etc/modprobe.d/i915.confVerify if it is enabled successfully after reboot:
journalctl -b -o short-monotonic -k | egrep -i "i915|dmr|dmc|guc|huc"
Testing Hardware Decoding
At this point, the onboard graphics card should be enabled successfully. Let’s test the effect using Jellyfin to play videos.
Mount the Synology network drive:
sudo mkdir -p /media/nas/media
sudo mount -t cifs -o rw,vers=3.0,credentials=/root/.smbcredentials,uid=1000,gid=1000 //192.168.50.102/media /media/nas/media
To automatically mount on boot, you can add the following line to /etc/fstab:
//192.168.50.102/media /media/nas/media cifs vers=3.0,credentials=/root/.smbcredentials,uid=1000,gid=1000
Install the Docker service by referring to the official documentation https://docs.docker.com/engine/install/debian/
. Then start the Jellyfin service. Here, we are using the nyanmisaka/jellyfin image from N, which has built-in dependencies and drivers for hardware decoding.
docker run \
  -d \
  --name='jellyfin' \
  -e TZ="Asia/Shanghai" \
  -p '8096:8096/tcp' \
  -p '7359:7359/udp' \
  -p '1900:1900/udp' \
  -v '/media/nas/':'/media/':'rw' \
  -v '/home/tomo/docker/jellyfin':'/config':'rw' \
  -v '/home/tomo/cache':'/cache':'rw' \
  --device='/dev/dri/' \
  --restart=always \
  'nyanmisaka/jellyfin:latest'
Wait for the image to be pulled and the service to start. Then, log in to Jellyfin through port 8096 for initialization. After initialization, go to the dashboard from the upper left corner menu, select playback settings, and enable hardware decoding. We choose Intel QuickSync(QSV) as the hardware acceleration option. The complete configuration is as follows:

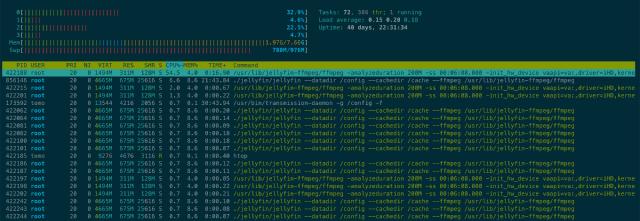
We choose a 4K video to test the hardware decoding effect. (The intel_gpu_top command throws an error in this mode. The cause and solution have not been found yet. You can use the htop command to observe the CPU usage and judge it in conjunction with the information of the playing video.)
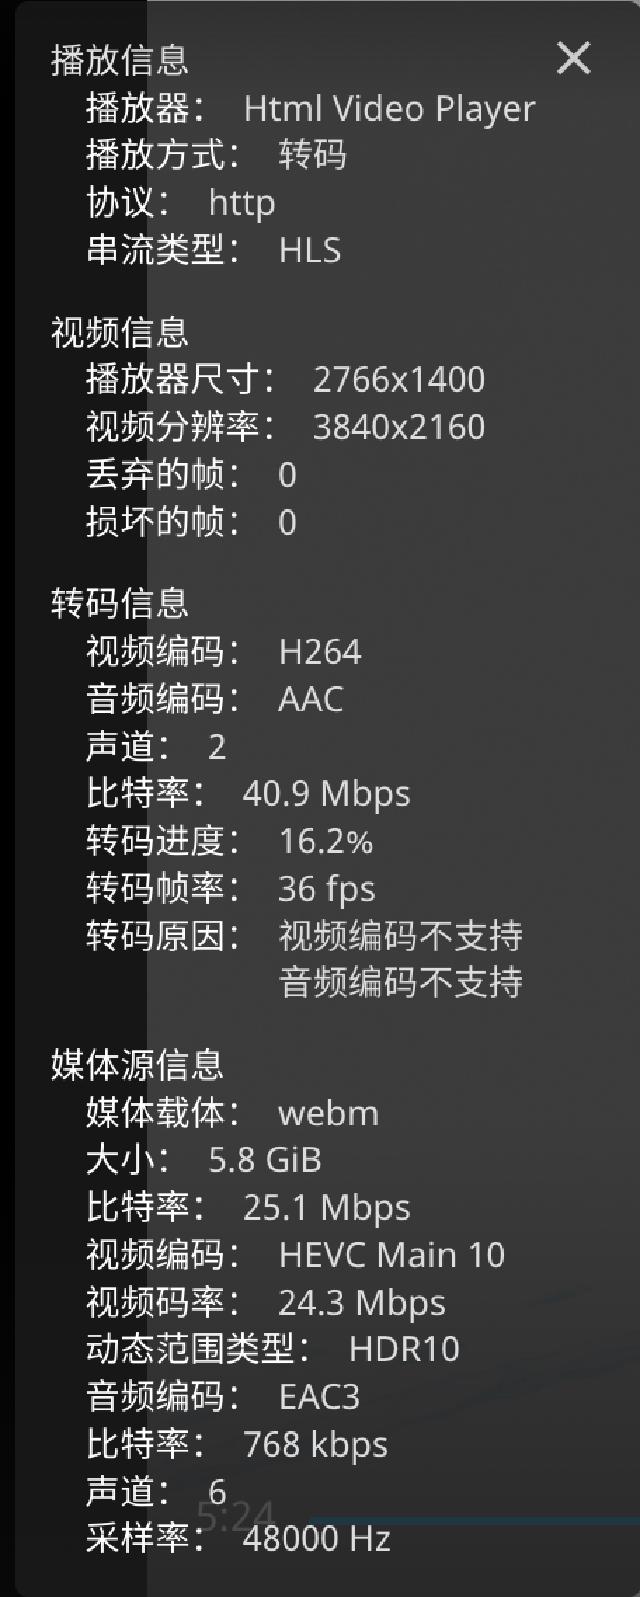
You can see that the playback information shows transcoding, the htop command displays the FFmpeg process, and the CPU usage is relatively normal.
