前言
最近想写点东西放到网上,便简单调研了市面上的一些blog系统,最终选择了Hugo 。选择Hugo原因就是因为快,而且生成的静态站点可以有不错的性能,也能方便的部署。
发布一个静态站点有几个前提条件:
- 一个域名,我在Google Domain
买了个
dev域名:tomo.dev,这个也将最后作为博客地址。 - 一个静态站点服务器,类似
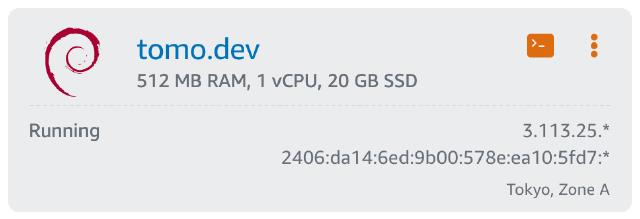
Github Pages或者一些为开源项目提供站点服务的平台均可以选择。由于我Git仓库设置为了私有,所以我使用了我自己的一台AWS Lightsail作为静态站点。
Do
安装及初始化站点
参考官方文档进行安装https://gohugo.io/getting-started/installing/
brew install hugo
hugo new site tomo.dev
cd tomo.dev
安装主题
可以从Hugo主题站点 寻找满意的主题,这边使用是一款Hello Friend 主题。
git clone https://github.com/panr/hugo-theme-hello-friend.git themes/hello-friend
参考该主题的官方文档配置config.toml
[params]
  # dir name of your blog content (default is `content/posts`).
  # the list of set content will show up on your index page (baseurl).
  contentTypeName = "posts"

  # "light" or "dark"
  defaultTheme = "dark"

  # if you set this to 0, only submenu trigger will be visible
  showMenuItems = 2

  # Show reading time in minutes for posts
  showReadingTime = true

  # Show table of contents at the top of your posts (defaults to false)
  # Alternatively, add this param to post front matter for specific posts
  toc = true

  # Show full page content in RSS feed items
  #(default is Description or Summary metadata in the front matter)
  # rssFullText = true

[languages]
  [languages.en]
    title = "tomo.dev"
    subtitle = "tomo's blog"
    keywords = ""
    copyright = ""
    menuMore = "Show more"
    writtenBy = "Written by"
    readMore = "Read more"
    readOtherPosts = "Read other posts"
    newerPosts = "Newer posts"
    olderPosts = "Older posts"
    minuteReadingTime = "min read"
    dateFormatSingle = "2006-01-02"
    dateFormatList = "2006-01-02"
    # leave empty to disable, enter display text to enable
    # lastModDisplay = ""

    [languages.en.params.logo]
      logoText = "tomo.dev"
      logoHomeLink = "/"
    # or
    #
    # path = "/img/your-example-logo.svg"
    # alt = "Your example logo alt text"

    [languages.en.menu]
      [[languages.en.menu.main]]
        identifier = "about"
        name = "About"
        url = "/about"
编写
- 新建博客:
hugo new posts/blog-using-hugo/index.md - 启动本地开发站点:
hugo server -t hello-friend -w -D
可以使用文本编辑器打开项目目录,目录结构可以参考官方文档:directory-structure/
编辑content/posts/blog-using-hugo/index.md文件,文件前半段为front-matter
,
默认为yaml格式,可用的变量可以参考文档中的front-matter-variables部分,下面是示例:
title: "Blog Using Hugo"
date: 2021-11-11
description: "How to setup a blog using Hugo"
isCJKLanguage: true
draft: true
tags: ['others']
后半段为文章的内容,默认为markdown格式。我们在编写文档的过程中,hugo本地服务器会实时渲染,方便我们对内容进行预览。
Deploy
服务器
这里使用的是AWS Lightsail ,每月$3.5。

Caddyserver
服务器选用的Caddyserver ,使用Caddyserver的好处是其可以自动化管理HTTPS证书,只需要配置文件中编写https域名地址入口, 然后将域名解析指向该服务器就可以。安装参考官方文档:https://caddyserver.com/docs/install 。
配置:
https://tomo.dev {
        log {
                output file /var/log/caddy/tomodev.log
                format json
                level INFO
        }
        # Set this path to your site's directory.
        root * /var/www/tomo.dev
        encode zstd gzip

        # Enable the static file server.
        file_server

        handle_errors {
                @404 {
                        expression {http.error.status_code} == 404
                }
                rewrite @404 /404.html
                file_server
        }
}
部署
使用简单的Makefile:make deploy
RSYNC=rsync -avzh --delete --rsync-path="sudo rsync"

build:
	hugo --minify

deploy: build
	${RSYNC} public/ [email protected]:/var/www/tomo.dev/

dry-run: build
	${RSYNC} --dry-run public/ [email protected]:/var/www/tomo.dev/
访问
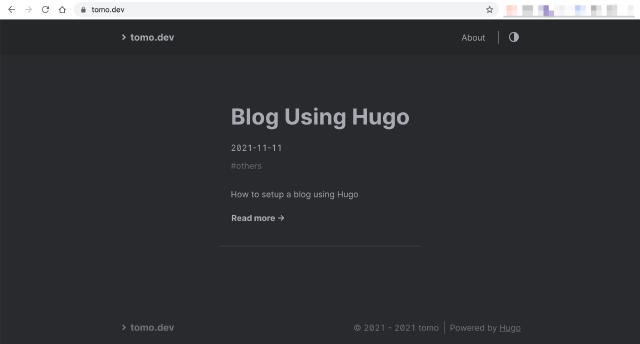
最后编写完成后,编辑front-matter中的draft变量,改为false,部署后可以打开站点进行浏览。

