Foreword
I recently wanted to write some content and publish it online, so I briefly researched some available blog systems and ultimately chose Hugo . The reason for choosing Hugo is its speed, and the generated static sites offer good performance and are easy to deploy.
There are a few prerequisites for publishing a static site:
- A domain name: I bought a
devdomain,tomo.dev, from Google Domain , which will also be the final blog address. - A static site server: You can choose similar platforms like
Github Pagesor other platforms that provide site services for open-source projects. Since my Git repository is set to private, I use one of my own AWS Lightsail instances as the static site server.
Do
Installation and Site Initialization
Refer to the official documentation for installation: https://gohugo.io/getting-started/installing/
brew install hugo
hugo new site tomo.dev
cd tomo.dev
Theme Installation
You can find a theme you like from the Hugo Themes website . Here, we use the Hello Friend theme.
git clone https://github.com/panr/hugo-theme-hello-friend.git themes/hello-friend
Configure config.toml according to the theme’s official documentation:
[params]
  # dir name of your blog content (default is `content/posts`).
  # the list of set content will show up on your index page (baseurl).
  contentTypeName = "posts"

  # "light" or "dark"
  defaultTheme = "dark"

  # if you set this to 0, only submenu trigger will be visible
  showMenuItems = 2

  # Show reading time in minutes for posts
  showReadingTime = true

  # Show table of contents at the top of your posts (defaults to false)
  # Alternatively, add this param to post front matter for specific posts
  toc = true

  # Show full page content in RSS feed items
  #(default is Description or Summary metadata in the front matter)
  # rssFullText = true

[languages]
  [languages.en]
    title = "tomo.dev"
    subtitle = "tomo's blog"
    keywords = ""
    copyright = ""
    menuMore = "Show more"
    writtenBy = "Written by"
    readMore = "Read more"
    readOtherPosts = "Read other posts"
    newerPosts = "Newer posts"
    olderPosts = "Older posts"
    minuteReadingTime = "min read"
    dateFormatSingle = "2006-01-02"
    dateFormatList = "2006-01-02"
    # leave empty to disable, enter display text to enable
    # lastModDisplay = ""

    [languages.en.params.logo]
      logoText = "tomo.dev"
      logoHomeLink = "/"
    # or
    #
    # path = "/img/your-example-logo.svg"
    # alt = "Your example logo alt text"

    [languages.en.menu]
      [[languages.en.menu.main]]
        identifier = "about"
        name = "About"
        url = "/about"
Writing
- Create a new blog post:
hugo new posts/blog-using-hugo/index.md - Start the local development server:
hugo server -t hello-friend -w -D
You can use a text editor to open the project directory. The directory structure can be referred to in the official documentation: directory-structure/
Edit the content/posts/blog-using-hugo/index.md file. The first part of the file is the front-matter
, which defaults to yaml format. Available variables can be referred to in the front-matter-variables section of the documentation. Here is an example:
title: "Blog Using Hugo"
date: 2021-11-11
description: "How to setup a blog using Hugo"
isCJKLanguage: true
draft: true
tags: ['others']
The second part is the content of the article, which defaults to markdown format. While we are writing the document, the local Hugo server will render it in real-time, making it easy for us to preview the content.
Deploy
Server
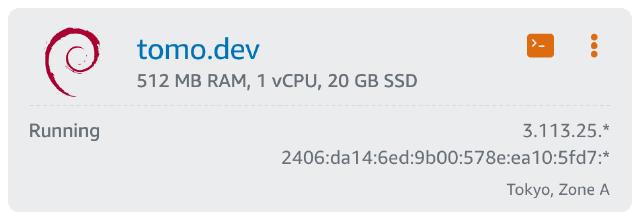
Here, we use AWS Lightsail , which costs $3.5 per month.

Caddyserver
The server uses Caddyserver . The advantage of using Caddyserver is that it can automatically manage HTTPS certificates. You only need to write the https domain name entry in the configuration file and then point the domain name resolution to this server. For installation, refer to the official documentation: https://caddyserver.com/docs/install .
Configuration:
https://tomo.dev {
        log {
                output file /var/log/caddy/tomodev.log
                format json
                level INFO
        }
        # Set this path to your site's directory.
        root * /var/www/tomo.dev
        encode zstd gzip

        # Enable the static file server.
        file_server

        handle_errors {
                @404 {
                        expression {http.error.status_code} == 404
                }
                rewrite @404 /404.html
                file_server
        }
}
Deployment
Use a simple Makefile: make deploy
RSYNC=rsync -avzh --delete --rsync-path="sudo rsync"

build:
	hugo --minify

deploy: build
	${RSYNC} public/ [email protected]:/var/www/tomo.dev/

dry-run: build
	${RSYNC} --dry-run public/ [email protected]:/var/www/tomo.dev/
Access
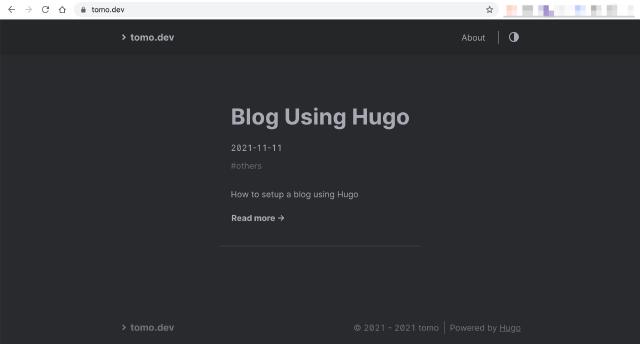
Finally, after writing is complete, edit the draft variable in the front-matter to false, deploy, and then you can open the site to view it.

